Wednesday, June 20, 2012

Taco Seasoning

I was happily making tacos for my family.  I had just browned my hamburger, opened up the pantry to grab the trusty packet of taco seasoning...and...I didn't have one.
Ugh!
I had just gotten home from work and really didn't feel like getting back into the car and driving down the street to the store just for a taco packet.  So I made my own, I had found this while browsing the internet.  
It makes about the equivalent of two packets.  It is quite spicy but I like it.
So for all of you who run out of seasoning packets this is for you! 
Enjoy!


Taco Seasoning

1 Tbsp Chili Powder
2 Tbsp Cornstarch
1/2 tsp Salt
1/2 tsp Pepper
1/4 tsp Garlic Powder
1/4 tsp Oregeno
1/4 tsp Onion Powder
1/2 tsp Paprika
1 1/2 tsp Cumin
1/4 tsp Cayenne Pepper


Pin It!

Friday, June 15, 2012

Made By Me: DIY Cleaning

Are you excited?
I know I am.
So you know how you can make your own laundry soap here.
My next thought was - what do I do about those annoying dryer sheets and fabric softener.
Well...I found it and I am going to share.  YAY!!!


Here is what you do.  Buy some Fabric Softener (your choice of brand and scent) 
and you need a hand towel.  SOAK the hand towel in the fabric softener and then SQUEEZE out all remaining drops.  Hang it over a chair or on a clothesline until COMPLETELY dry.  It takes about three days (yes...three days!)  Once you know it is completely dry, you will then be able to throw it in the dryer and use it just like a dryer sheet.  Use it for about 40-50 loads or a month.  
Then soak it again and do it over again.  And the best thing is that it works!!!


I have another one for you today too!  Make your own bathroom cleaner.  
This was amazing!  I just used it in my bathtub and it works!


What you need: White Distilled Vinegar and blue Dawn (it has to be the blue kind and I used Great Value) and a spray bottle.  You use equal amounts of vinegar and soap.  For my bathtub I used half a cup of each.  You heat up the vinegar in the microwave for about two minutes, place it and the soap in the spray bottle and mix gently.  You then spray the mixture all over, let it sit for a half hour or an hour and then wipe down.  AMAZING!  My faucets haven't shined like this for a very long time.  
I really do love do it yourself projects...and I hope you do too!
Pin It!

Sunday, June 10, 2012

Frozen S'Mores


It is me, Kelli, back with another great Pinterest find.  Bet you couldn't see that one coming. :)
I had a work party and needed to make a dessert and found this great recipe to try.  I made two batches of these using my Pampered Chef Mini Muffin Pan, so it made 48 of these little devils.  
They lasted about ten minutes at my work party.  They are that GOOD!  Enjoy! :)


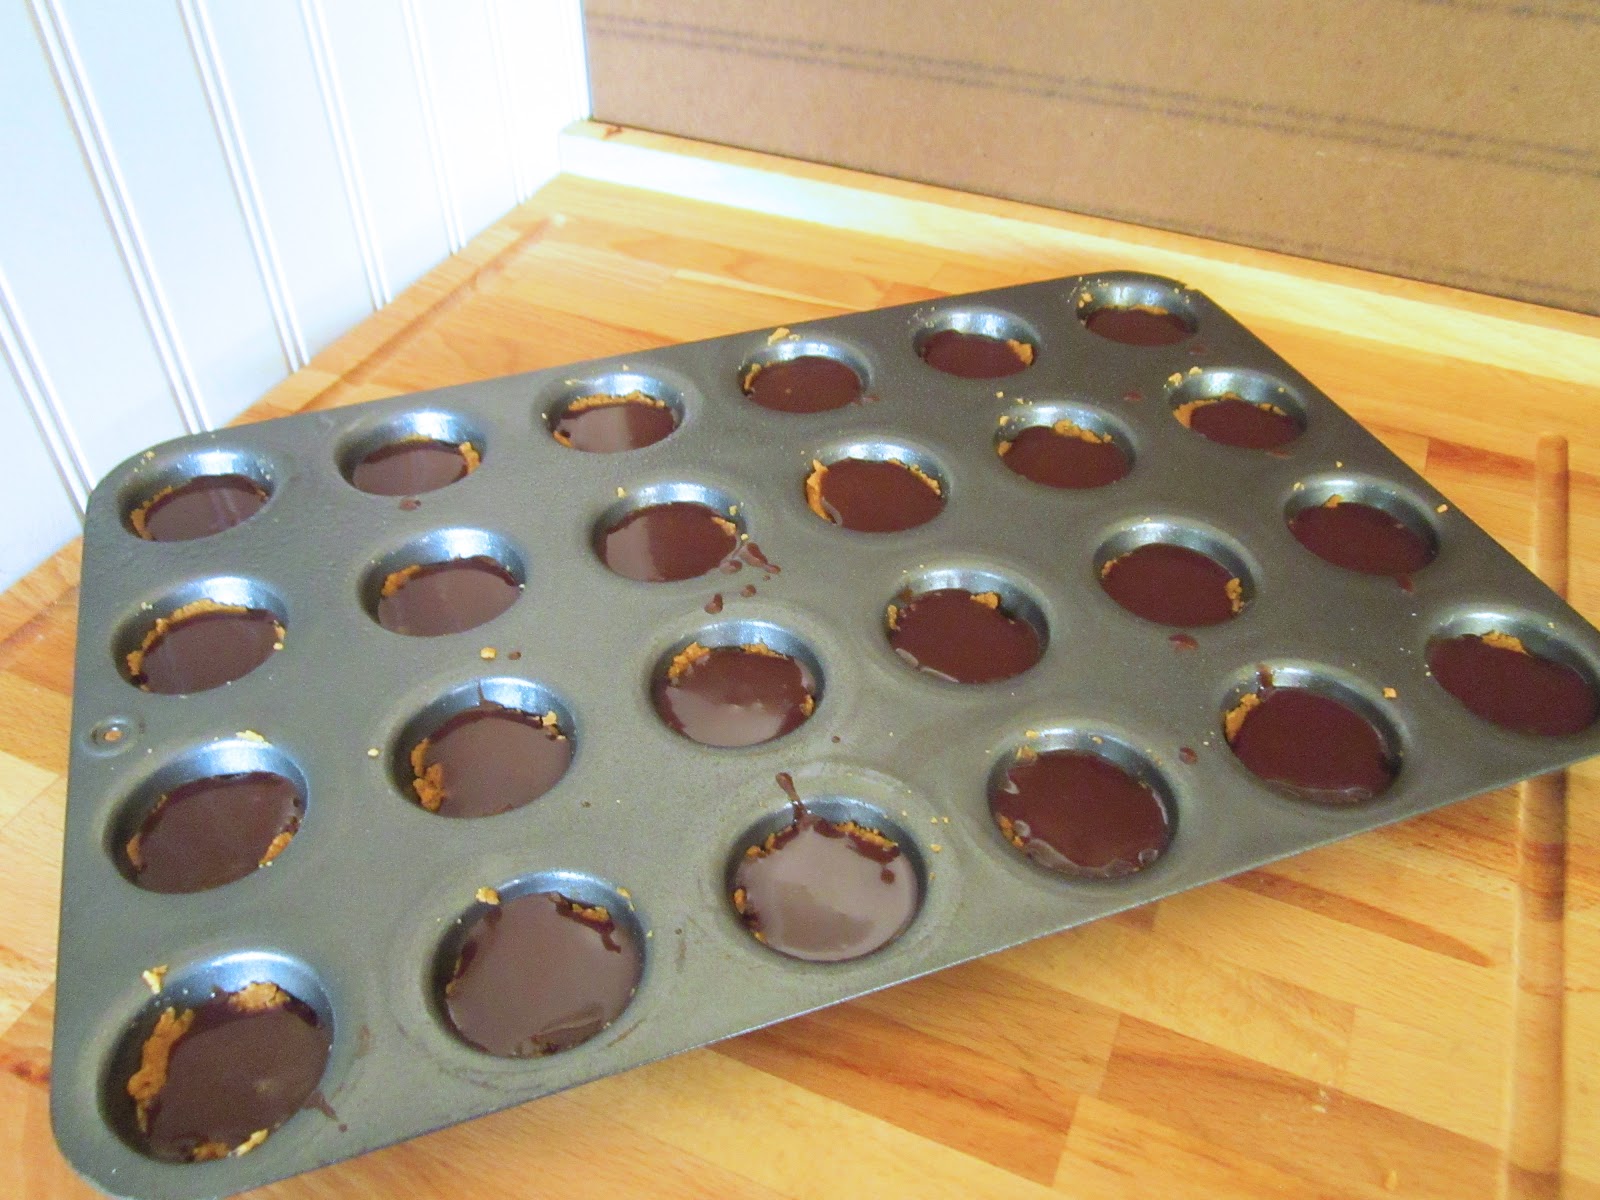
Mix the graham crackers with the butter and press into your pan with tart shaper.


Melt your chocolate chips with heavy whipping cream and pour into cups.


Divide marshmallows on top of the chocolate.


Pipe the pudding over top and freeze!


Frozen S'Mores
9 Sheets Graham Crackers
1/3 Cup Butter
1/2 Cup Milk Chocolate Chips
1/4 Cup Heavy Whipping Cream
2 Cup Mini Marshmallows
1 1/2 Cup Milk
1 box (3.9 oz) Instant Chocolate Pudding
1 (8 oz) Cool Whip (thawed in fridge)
Mini Chocolate Chips

Crush or blend graham crackers into fine crumbs. Melt butter and add to graham crackers, mixing until well combined to make crust. Prepare mini muffin pan with cooking spray. Evenly divide crust mixture into all cups, I used a Mini Tart Shaper to press crumbs firmly into the bottom of each cup. Place milk chocolate chips and whipping cream into a small bowl and microwave in 30 second increments, stirring in between, until melted and smooth. Spoon chocolate into center of each cup, on top of the crust.
Divide Marshmallows among cups. Mix the milk with pudding on medium speed for 2 minutes. Fold in 1/2 of the Cool Whip container (the rest will be used as topping). Spoon filling into each cup evenly. You can try to pipe it with in a ziploc bag so that the whole cup is filled. I didn't level off the tops because there wouldn't have been that much pudding, but you can use a knife to smooth the tops level with the top of the pan. Freeze for at least a couple of hours. Allow the pan to warm just a bit before popping each dessert cup out.  For topping pipe a little bit of the left over Cool Whip on each dessert then sprinkled the remaining crust and mini chocolate chips on top. Serve cold right away– or put them in a sealed container and freeze until you are ready to serve.
Pin It!

Friday, June 8, 2012

Ham N' Cheese Garden Loaf

(I was too busy eating this recipe to catch a picture, so this one from the Internet will have to do for now. It is similar but not exact.)

Need something fast, satisfying and fairly healthy for dinner?
How about a quick ham and cheese loaf that involves fresh vegetables?
I have spinach coming on in my garden so that was added as a whim and made a huge improvement on taste!

Ingredients:
2 boxes Jiffy pizza crust mix
2 teaspoons Mrs. Dash seasoning
3-4 tbs ranch dressing
8 big ol' slices of ham
2 cups shredded cheese
25-30 fresh spinach leaves
2 thinly sliced Roma tomatoes

First; combine the Mrs.Dash with the dry pizza crust mix. Then add one cup hot tap water, (as on the box directions) and mix until moist.
Put the dough in a warm place (about 85 degrees) ((like a warmed oven turned off)) for about 5 minutes until risen slightly.
Flour your counter and knead a few times.
Roll the dough into an oblong oval about 1/2 inch thick and transfer to a cookie sheet.
Spread ranch dressing over entire surface.
Place four ham slices down the center.
Place spinach leaves on ham followed by tomato slices.
Spread cheese over the vegetables then top with remaining four slices of ham.
Fold the ends of the dough over and pinch the ends so nothing leaks during cooking.
The fold the sides up over the innards (love that word) and pinch a seal across the top.
Bake at 350 degrees for 20-25 minutes or until dough is firm and innards (ha!) are hot.
Slice and serve.
YUM!
A kid-friendly food with benefits!

-A.S.
Pin It!

Thursday, June 7, 2012

Italiano Bruschetta

Mmmm...
Have you ever had some french bread sitting on your counter just calling on you to use it.
What do you do?  You can just rip open the bag and start eating those lovely carbs...or...try something else!
This happened to me the other night and I realized how much I was craving Bruschetta.
This lovely tomato, onion, basil concoction from Italiano is just tasty!
It is so simple to make and makes that french bread disappear fast.

The other night I just cut up one Roma tomato, a slice of onion, basil, a dash of olive oil and balsamic vinegar.  Mixed it together and dabbed a little bit more of balsamic vinegar until just right.  I cut thin slices of bread and stuck them in the toaster and topped with the bruschetta.
So yummy, but if you want to go full out here is a recipe from Our Best Bites (click here)!

Pin It!

Thursday, May 31, 2012

Cheesy Bacon Potato Skins

Once again, I was going through Pinterest when I came upon another tasty recipe.  
Have you ever been to Winger's and had their Wings N' Things Platter.  Yum!!!
This is a recipe duplicating these tasty potatoes.  The original recipe is here.

So I decided to make them since they were very simple and looked very good.
This was great and was very similar to having a potato bar ready to go.  Just add sour cream or ranch.


All you need: sliced potatoes, shredded cheese, bacon or real bacon bits


Cheesy Bacon Potato Skins
Potatoes, scrubbed well and sliced (you can decide to peel them or leave the peel on)
Cooking Spray
Shredded Cheese
Salt & Pepper to taste
Crumbled Bacon or real Bacon Bits

 Preheat oven to 375 degrees. Bring sliced potatoes to a boil in cold, salted water and cover for 5 minutes. Carefully drain, and transfer slices to a paper-towel lined countertop or cutting board. Pat to dry. Grease a baking sheet with cooking spray, and lay out potato slices on it. Spray lightly with additional cooking spray, then sprinkle with salt & pepper to taste. Sprinkle evenly with shredded cheese & bacon. Bake 12-14 minutes in preheated oven until cheese is melted & bubbly. Serve with sour cream or ranch or both.
Enjoy! :)
Pin It!

Friday, May 25, 2012

Un-Authentic Luau Food

So for food group this week I decided to try something really funky and different. Alright, what else is new, you're thinking? Since summer is approaching, I had an intense lust for Kalua pork, which used to be served at this fantastic little Hawaiian joint that shut down a few years ago. So I went searching for a recipe and happened upon a Kalua chicken recipe. Why stop there? In my high school cooking class we had the opportunity to make foods from around the world and one gal made up a gooey batch of coconut rolls and they have yet to leave my memory so I decided to add that to the menu. Then I got thinking about coleslaw in all its crunchy goodness and dredged up a Hawaiian coleslaw recipe and gave it my own flair. So today's menu:
Luau Food A'la Amy.


We'll start with the Kalua Chicken:
Get yourself about 6-8 lbs of chicken. (I used frozen because its cheaper)
Get yourself a bottle of smoke flavoring ($1 at Walmart)
Find yourself about 1/3 cup of course Sea Salt (DO NOT USE IODIZED TABLE SALT! Your face with pickle like a prune)
Add two cups of water to a big crock pot, stir in the salt and smoke and chuck in the chicken.
Set it on low for 6-8 hours until thoroughly steamy and smoky-licious.
Shred with a fork into the remaining juices. I actually got a potato masher and just pressed it into pieces. It seemed to work.


Next up, Sweet & Gooey Coconut Rolls;
If you're going to do rolls from scratch, good on ya. I used frozen Terrel's dough (best dough this side of the Mississippi) and let the frozen dough balls thaw and rise a bit.
Find yourself a can of Coconut Milk and pour half over the rising dough. Be sure to shake the can well or dump it in a bowl and stir in all the lumpy coconut fat until smooth. Mmm...coconut fat.
What do you do with the other half of the coconut milk? Why make another batch of rolls, dummy!
Never waste coconut milk. It is a sin in multiple countries.
Just because I'm a little strange, I gave the tops of the rolls a shot of cinnamon.
What's better than coconut and cinnamon?
Bake these luscious doughy-wonders at 350 until they are firm on top. They don't brown easily and if you let them brown they may be too done. They will soak up the coconut milk as they cook.

And now, Hawaiian Coleslaw;
This was a big experiment on my behalf. I had a recipe but it just didn't live up to the weirdness in my blood so I had to weird it up a little to get it right. :)
Start with your red and white cabbage/carrot mix. Once again, doing it from scratch is up to you. The bagged stuff works great because it is dry and the sauce sticks. But, it is your coleslaw. To bag or not to bag...that is your question.
Take 1/3 cup mayonnaise
1/4 teaspoon ginger
1/4 teaspoon nutmeg
a pinch of salt
1 cup crushed pineapple w/ juice
1/3 cup craisins
1/3 cup shredded coconut
2 tbs sugar
and 1/3 cup crazy.
 (The crazy is up to you. I used a Caribbean spice mix that gave it a kick. You do not have to do this.)
Mix well then toss with the dry cabbage/carrot mixture.
Let it sit for a few hours to soak in the goodness.

These foods are pretty good by themselves but the key to unlocking the awesome power of this meal is in the cramming of them, all together, into one bite. I served some brown rice with the chicken for those who can't handle the awesome in one mouthful. The meat juices makes a good flavor-enhancer for the rice or roll-dip if you're into Au Ju.
But if you are into flavor-packed deliciousness...here is what you do;
Split a gooey roll, top with chicken. Then slaw.
Shove that baby in your mouth.
It. Is. Awesome.
Enjoy!
-A.S.
Pin It!

Tuesday, May 22, 2012

Baked French Toast

Oh my...I am excited to share this with you.
So I was browsing through Pinterest and came across a recipe for Baked French Toast.  
It looked so delicious and glancing at the recipe it didn't look difficult at all.  Then at the bottom the blogger had written "adapted from The Pioneer Woman's recipe."  I knew that this had to be heaven because I absolutely love her website and her recipes.  They are simple and very, very good!
Go check out her website here.


So we were having a get together at my sister's house and I decided that this would be the perfect time to try this recipe out - with a group of family member.  Great guinea pigs. :)
We made it the night before and made the topping that morning before putting it in the oven.
I must say, that I may never make regular french toast again...it is THAT GOOD!
The best part for me is that you don't need to put butter or syrup over the top.  Already perfect.
I had to take a picture before it was all gone.  We all loved it (even the kids who were skeptical at first)!
Here is the original recipe link...click here.
Enjoy!

Baked French Toast

French Toast:
1 loaf French Bread or Sourdough Bread
8 Whole Eggs
2 Cups Milk
1/2 Cup Heavy Whipping Cream
3/4 Cups Sugar
2 Tbsp Vanilla

Topping:
1/2 Cup Flour
1/2 Cup Brown Sugar, packed
1 tsp Cinnamon
1/4 tsp Salt
1 stick Butter, cold, cut into pieces

Grease 9 x 13-inch baking pan. Tear bread into chunks and evenly distribute in the pan. Mix together eggs, milk, cream, sugar, and vanilla. Pour evenly over bread. Cover tightly and store in the fridge several hours or overnight.
In a separate bowl, mix flour, brown sugar, cinnamon, and salt. Add butter pieces and but into the dry mixture until mixture resembles fine pebbles. Store in a Ziploc in the fridge.
When you're ready to bake the casserole, preheat oven to 350 degrees. Remove casserole from fridge and sprinkle crumb mixture over the top. Bake for 45 minutes for a softer, more bread pudding texture. Bake 1 hour or more for a firmer, less liquid texture. Scoop out individual portions.
Pin It!

Friday, May 11, 2012

Tator Tot Casserole

Growing up this was one of the casseroles that my mom would make for us that we would ALL eat.
I still like it and my kids like it too.  Tried and true recipe! :)
It is tasty and has something that almost every kid will eat.


Tator Tots, Hamburger, Chicken & Rice Soup, Chicken Gumbo Soup, and French Style Green Beans

I am making this for a neighbor so I bought one of those foil casserole dishes.  
Since it was pretty large I decided to split it in half.  
Part of it the casserole and the other half I filled with the extra tator tots.  
Kids love tator tots and I figured that was a great extra to give my neighbor.


Brown your hamburger (you can use onion...but since this is for a family with young kids I didn't)
Place it on the bottom on your dish.


Next comes the french style green beans.  Drain them and place them over your hamburger.


Take your two soups and boil them on your stove top and mix them well.
Pour this over your green beans and hamburger.  
Cover with tator tots.
Bake for about half hour to one hour at 350 degrees.


Tator Tot Casserole
1 lb Ground Beef
1 small Onion
1 bag Frozen Tator Tot Potatoes
1 can French Green Beans
1 can Chicken Gumbo Soup
1 can Chicken Rice Soup

In a pan brown the beef with the onions. Spread on the bottom of a casserole dish. Drain the green bean and spread over the meat. In a saucepan combine the soups and heat to boiling. Pour that over the bean layer. Cover the top with the tator tot potatoes. Bake for about an hour at 350 degrees.
Pin It!

Wednesday, May 9, 2012

Laundry Soap...again

So you remember a while back when dearest Amy shared the making of your own Laundry soap (click here).
Well, I had to make mine again and I thought I would share it again...because it is just too cool!
I made this about six months ago and now am making it again.  I call that a bargain.


Arm & Hammer Washing Soda
Borax
Fels-Naptha Soap Bar


5 gallon bucket
&
Previously used Laundry Soap container
You will need to fill your 5 gallon bucket half full with HOT water.


Now you will grate your Fels-Naptha Soap bar


With your cheese grater (yes...I said cheese grater) into a pot that has 4 Cups Water in it.


It will look like this.
Boil that on your stove top on medium high heat until your soap has melted.
It will be a little foamy.
Pour this soap concoction into your 5 gallon bucket and stir.
Now, pour in your 1 cup washing soda and 1/2 cup borax...stir again.


Finish filling up your bucket to the top with water.
Put your lid on, stick it in a corner and forget about it for 24 hours.
Give it a good stir the next day and then take a funnel and fill up your previously used laundry soap container half full of this lovely stuff and then fill the rest with water.  Shake. 
IMPORTANT:  you will need to shake your container every time you use it because the soap settles!

There you go...your own laundry soap.
Pin It!